Finding Peace, Comfort and Dessert ...

Tuesday, July 19, 2011

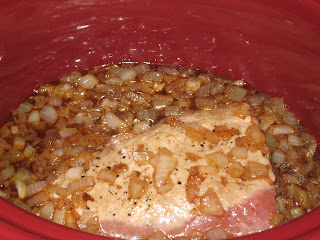
Slow cooker: Maple Glazed Pork Loin

So I've been graced with ANOTHER phenomenal cookbook from America's Test Kitchen : Slow Cooker Revolution - 200 Slow Cooker Recipes. (Pick up your copy here .. you won't be disappointed!) Man oh MAN I've been so excited to whip out my slow cooker, mostly because I just love it and I love how EASY it makes my life.

This summer has been unbelievably hectic, leaving me next to NO room for field testing new dishes... this cookbook has arrived at the precisely best moment in my life and re-ignited my passions. Oh .. so many dishes... so little time!

I had just about every thing I needed for this dish on hand, except for some real maple syrup. We're an imitation.butter.flavor.kind.of.family, sad... but the kiddo's love it. SO after a quick trip to the store, tots in tow -- loving driving around in the car shaped shopping cart - we were off to a very late start for a slow cooker meal. Time arrived back from the store: 3:40pm! I was worried, I was so looking forward to this dish .. I decided I'd give it a go anyway.  Fully cooked in just 3 hours 20 minutes *whew!*- it was sweet, soft, juicy and delicious. BUT I cooked a much smaller 2 lb loin. The recipe, which I've shared below, calls for a 4-5 pound loin -so be better than me and practice good time management if you are preparing this for a bigger crowd!


Maple Glazed Pork Loin

This dish is sweet with just the perfect little kick - sure to wow your whole family over!

Ingredients:

1 4-5lb boneless Pork Loin (mine was only 2lbs)
2 Tablespoons Veggie Oil
1 White Onion, minced
1/2 Teaspoon Ground Cinnamon
1/4 Teaspoon Ground Cloves
1/8 Teaspoon Cayenne Pepper
1 Cup Maple Syrup (Grade A dark)
1/2 Cup Chicken Stock
Salt n Pepper


Step 1.
Dry the pork with some paper towels and give it a nice coating of salt and pepper.

Step 2.
Heat 1 tablespoon of veggie oil in a skillet and brown both sides of your loin. This will get the process started and deepen the flavors in the dish. Put the loin in the slow cooker.


Step 3.
Add the other tablespoon of veggie oil to the skillet and toss in the onion, cinnamon, cloves, cayenne and a dash of salt & pepper. Saute until the onion is softened, about 8 minutes.

Step 4.
Enjoy the wondrous fragrance now filling your kitchen.


Step 5.
Add in the maple syrup and the chicken stock. Mix well, scraping up any brown bits off the bottom of your skillet. Just heat through, then poor of the waiting loin in the slow cooker.

Step 6.
Cover and cook on low for about 4 hours .. or until an instant read thermometer says 140-145. This is the perfect temperature for pork and ensuring this step will keep the loin from drying out and/or falling apart.

Step 7.
Turn the slow cooker off. Remove loin from the cooker and let it rest, tented with foil or semi covered in a dish, for 10 minutes.

Step 8.
After letting the liquid sit for a minute, skim the fat off the top.

Step 9.
Transfer the liquid to the skillet and bring to a simmer. Simmer for about 15 minutes, or until the mixture is reduced to about a cup a half.

Step 10.
Slice the pork while you're waiting.

Step 11.
Pour reduction over the loin and serve this sweet delicious pork with your favorite sides!

Had to show you again! Deeelicous! 

We had ours with made from scratch mashed potatoes and my favorite rosemary roasted broccoli. Definitely a family favorite! I hope everyone out there is enjoying their summers - and finding time to relax with a tall cool glass of lemonade by the pool. I know I'm trying to find time to!

Wednesday, June 29, 2011

Orange Crush Cakes!

SO I made these mini delights for a cupcake swap held by some amazing ladies here on Fort Meade a couple weeks ago. There were so many delicious treats, my favorite (other than mine, teehee...) was the White Chocolate Macadamia Nut  ones .. oh.my.goodness. I need that recipe! ;) This recipe, however, comes from my favorite food companion site to my favorite food blog Tastykitchen.com and you can find it here.

But these little beauties are perfect for the summer time ... fresh and citrus-y, fun for the kids to help make and eat, and a little unique!

Now, I've discovered something about my house and butter cream frosting. My house is too warm to effectively make the fluffy goodness that is butter cream icing. SO the texture was a little off for mine, until I stuck them in the fridge. SO keep that in mind, having a cool kitchen makes for better butter cream. I've learned my lesson.

Orange Crush Cakes 

For the Cupcakes: 
1 cup Salted Butter, softened
1-¼ cup Sugar
5 whole Large Eggs
2 teaspoons Vanilla Extract
2 whole Oranges, Zested
3 cups Flour
1 tablespoon Baking Powder
½ cups Milk

For the Frosting: 

1 cup Butter, Softened
5 cups Powdered Sugar
½ cups Orange Crush Soda
1 teaspoon Orange Flavored Extract
5 drops Red food coloring
5 drops Yellow food coloring


Step 1.
To make cupcakes, preheat oven to 350 degrees.

Step 2. 
Beat butter and sugar until fluffy.

Step 3. 
 Add eggs, vanilla and zest of 2 oranges. 

Step 4. 
Add flour, baking powder and salt. 

Step 5. 
Add in milk.
Step 6. 
Fill muffin cups 2/3 full  and bake for about 20 minutes. (This recipe will make approx 2 dozen regular sized cupcakes, or close to 100 mini cupcakes, which is what I made.)

Step 7.
Cool completely on a wire rack.

While these treasures are baking beautifully, whip up the frosting and stick it in the fridge! 

Step 1.
Beat butter until fluffy. 

Step 2.
Slowly add in the powdered sugar, orange Crush and orange extract. Beat for several minutes, until fluffy and well incorporated. 

Step 3.
Mix in food coloring

Frost the cupcakes when cooled and hand these little babies out! ;) 

You'll notice I've included less pictures in this post. Fundamentally, cake batters look the same. We're looking for a consistency similar to pancake batter, maybe just a touch thinner. <3

Tuesday, June 28, 2011

Easy enchiladas!

So, first I must apologize for the time between posts! Its been a crazy busy start to summer here! I've got 3 kids at home right now, I'm in the process of starting my new job, started a girly boutique with my darling Sister,  DH is in class full time and I've also started my last full college semester! *whew!*

To add more to the mix, I've been working on a cookbook to share with all you followers in a give away by the end of July. I won't spoil the surprise, but its going to be 15 of my favorite dishes (of 2010.. because lets face it .. next year my life will be filled with new food loves ... I'm fickle like that!) -- a mixture of entrees and desserts. Maybe a breakfast casserole. I am really excited to share it with you, I hope that you enjoy it as much as I do!

Now for the star of today's episode -- super easy Turkey Enchiladas. The original recipe (here) is for beef enchiladas, but we never have ground beef in our freezer, so I made the easy substitution. Honestly, if you don't tell your guests or family, they won't know anyhow! ;)

Turkey Enchiladas

Ok, so maybe these are more like burritos, but they are simple and delicious anyhow! This is also a great recipe for kitchen helpers!

Ingredients:

1 pound Ground Turkey
½ cups Diced Onion
1 can Refried Beans
1 can 8 oz Tomato Sauce
1 package Taco Seasoning mix
1 can Medium Enchilada Sauce (I think I used the 10 oz can...)
10 whole Flour Enchiladas
1-½ cup Shredded Cheddar Cheese


                                                      Step 1.
Brown the ground turkey and mix in the taco seasoning.

Step 2.
Add onions, beans, and tomato sauce. Stir together until well mixed.


Step 3.
Assembly! Place about 2-3 tablespoons of the meat mixture onto a tortilla, top with a spoonful of enchilada sauce and some cheese. Roll and place in greased 9 x 13 pan. (I only managed to get 7 in my pan, I rolled mine kind of big)


Step 4.
Mix the remaining enchilada sauce with the rest of the meat mixture and pour over the top of the enchiladas. Sprinkle with cheese.

Bake at 350 for about 30 minutes.


Whip up some Spanish ... or yellow ... rice if you wanna, but these are good just the way they are! 


Monday, May 16, 2011

It's summer time .. and the livin' is easy....

Ahh summer! BBQs.pools.sun tans.margaritas. Its my second favorite season. (Lets face it, I'm really a cold weather girl.) There is nothing better than the smell of a charcoal grill, a nice cool beverage in hand - hanging out with your best buds.

This is the season for our favorite potluck type dishes. When its hot, and we'd rather be socializing, slaving over a hot stove just isn't in our agenda. Fear not, my friends. You can still make fabulous dishes that take just  minutes of prep and will still wow your friends and family. A couple of my absolute summer favorites are potato salad and blackberry cobbler. Ooooh yum. And nothing beats fresh picked blackberries, if you are lucky enough to live somewhere where you have some. Sadly, I am not at the moment. But some day .. oh some day I'll send my darling cherubs out to the edge of the yard to prick their fingers and bring me back a basket of blackberries ... purple stained fingers and lips because they've snuck some on the way back. ;)

But first, lets cover potato salad. Generally, potato salad is that "obligatory" food at a cook out. No one really ENJOYS eating it, but it pairs decent with brats, burgers and 'dogs. Potato salad comes in two basic types: with mustard and without. I love mustard. So mine is a "with mustard" dish. But its so remarkably unforgettable your friends might actually eat it all and then beg you to tell them how you did it, or where you bought it. -- When that happens, smile to yourself. You've turned one boring side dish into a desirable event. And give them the recipe if you want, or hold onto it as a family secret. I won't tell. ;)

Potato Salad with Peas and Bacon

I don't usually have a preference for potatoes. All things being what they are I buy what gives me the most bang for my stretched buck these days -- which is almost always Russet potatoes. So that's what I used here -- but feel free to use your favorite!

2 pounds potatoes
1 Teaspoon salt
2 hard boiled eggs
1 Cup cooked frozen peas
1 Cup mayonnaise
1 Tablespoons sour cream
3 Teaspoons yellow mustard
2 Tablespoons bacon bits


Step 1.
Peel and dice the potatoes. Add the teaspoon of salt to a saucepan filled with water and boil the potatoes, about 20 minutes or until tender.

Step 2.
Chop eggs and cook the frozen peas.

Step 3.
toss the eggs, peas and potatoes together and refrigerate until chilled.

Step 4.
Mix mayo, sour cream, bacon bits and mustard together in a small bowl.

Step 5.
Gently coat the potatoes with the mayo/mustard mixture. Salt and pepper to taste. Refrigerate until ready to serve!


*** WAIT! Lets cover one thing real fast : hard boiling eggs. Now, for years I've wondered HOW you go about hard-boiling an egg .. and everyone has a different theory. Start with the water cold, drop in eggs, and then simmer for X minutes ... bring water to boil THEN drop in eggs (this almost always results in cracking) ... and I always wonder whether or not they are actually done in the middle. -- Have you tried shaking it to see if you can hear sloshing? I have. Not an effective method. 

My 1000 Best Recipes cookbook from America's Test Kitchen solved my dilemma. I've made 2 batches of hard boiled eggs with their method and its been complete egg perfection. So here goes:

Put your eggs in a pot of cool water and bring to a boil. When the water starts to boil, take it off the heat, cover and let the eggs sit for 10 minutes.  TADA. That.easy.

Ok.. moving on. 


Blackberry Cobbler

This recipe comes from my favorite food blogger thepioneerwoman.com. Blackberries were on sale at my local grocer and I just LOVE blackberry cobbler. Its like biting into a tiny piece of my childhood. This recipe is more cake like and it should be noted that it does not keep well... so save this dish for a gathering ... unless you want to keep it all for yourself! 

1/2 Cups melted butter (I use salted butter, if you don't add 1/2 tsp of salt)
1 1/2 Teaspoons baking powder
1 Cup all-purpose flour
1 1/4 Cups sugar
1 Cup milk
2 Pints blackberries


Step 1.
Melt butter in a microwavable dish. Preheat oven to 350.

Step 2.
Pour 1 cup of sugar, baking powder and flour into a mixing bowl, whisking in milk. Mix well. (if you are adding salt, do it here.)

Step3.
Pour in melted butter and whisk it all well together.

Step 4.
Butter a baking dish.

Step 5.
Now rinse and pat dry the blackberries.

Step 6.
Pour the batter into the buttered baking dish. Sprinkle blackberries over the top of the batter; distributing evenly. Sprinkle ¼ cup sugar over the top.

Step7.
Bake 1 hour, or until golden and bubbly.


** for a little extra crunch to the top - sprinkle an additional teaspoon of sugar over the cobbler 10 minutes before it’s done.


So there you have it!  Two classic summer dishes with slightly new twists. Give 'em a try, share them with friends, raise your glasses and embrace your lives -- you only get this one, so start now. Here's to an AWESOME time! <3

Saturday, May 7, 2011

Knock You Naked ...

Brownies. 

Yep.

Mmmmmm....

OK, to dive -- this is a layered brownie "classic". I say that with one raised eye brow because I've never heard of this recipe before and classic dessert recipes to me are like chocolate chip cookies, fudge brownies, or apple pie. But somewhere in the culinary world, this is ranked as a classic. And I absolutely understand why! These are so.amazing -- just take a moment to savor these ingredients: delicious chocolatey brownies, smooth ooey-gooey caramel, crunchy walnuts... oh.em.gee. -- and so.easy you aren't even going to believe it!

I was scouring through my  favorite food blog (thepoineerwoman.com) and came across this recipe. I needed something to serve as dessert with chicken cesar salad as the main course with some new friends. My first choice was a chocolate mouse cake, but I didn't have enough time to refrigerate it properly. So -- brownies it was! I had 90% of the ingredients I needed on hand, so with just a quick stop by the supermarket I was on my way to brownie bliss!

Knock You Naked Brownies

From the original I substituted walnuts for pecans, added a handful of bittersweet (60%) chocolate chips and a bottom layer soak of coffee liqour. 


Ingredients:
1 box German Chocolate Cake Mix
1 Cup(s) finely chopped walnuts
3/4 Cup(s) evaporated milk
1/2 Cup(s) melted butter
60 whole unwrapped caramels
1/3 Cup(s) semi-sweet chocolate chips
1/4 Cup(s) powdered sugar
1 Ounce(s) coffee liqour
1/4 Cup(s) bittersweet chocolate chips

Step 1.
Preheat oven to 350 degrees.

Step 2.
In a large bowl, mix together cake mix, chopped walnuts, 1/3 cup evaporated milk, and melted butter. Stir together until totally combined. The mixture will be very thick.


Step 3.
Press half the mixture into a well-greased 9 x 9 inch square baking pan. Bake for 8 to 10 minutes. Remove pan from the oven, pour coffee liquor over it and set aside.

Step 4.
In a double boiler (or a heatproof bowl set over a saucepan of boiling water) melt caramels with additional 1/2 cup evaporated milk. Sprinkle bittersweet chips over the brownie. When melted and combined, pour the caramel over the brownie base. Sprinkle the semi-sweet chocolate chips as evenly as you can over the caramel.


Step 5.
Turn out remaining brownie dough on work surface. Use your hands to press it into a large square a little smaller than the pan. Use a spatula to remove it from the surface, then set it on top of the caramel and chocolate chips.

Step 6.
Bake for 20 to 25 minutes. Allow the dish to cool to room temperature, then cover and refrigerate for several hours.

Step 7.
When ready to serve, generously sift powdered sugar over the surface of the brownies. Cut into either nine or twelve helpings, and carefully remove from the pan. 


-- You can see in the pictures I used a 9x13 dish -- if you choose to do so as well, double the German chocolate cake mix, butter and evaporated milk to ensure thicker brownie layer goodness. They will make for better photos that way too ;)

Now go on, bake yourself up a little slice of heaven -- you'll be wondering where these little devils have been your whole life! 

Tuesday, May 3, 2011

Easiest summer dessert...

I've been a little busy the last couple of weeks, my son turned 4 and its the end of my semester so I've been working on my finals. Along with being super busy at home, I've completely set my Yoga practice on the back burner - and I'm paying the price for it. Since I have next month off from one of my obligations, I'm going to make sure I get a good routine established! I have resolutions to complete! =) .. Now, on to the treats!

As you have probably noticed .. I am in love with raspberries right now. They are so refreshing, the perfect addition to the slowly.warming.up.spring weather we are having here in Maryland. This is an AMAZINGLY easy no-bake pie that will win over the masses. Seriously. I could eat the whole dish! And my boy licked the beaters clean! ;)  Want to make your mom a special treat on a budget? Wow her with this pie and she'll remember you all year! 

The recipe is from my absolute favorite food-blogger/photographer/cookbook and fiction author The Pioneer Woman: Ree Drummond  -- if you haven't gone to check her, and her amazing dishes, out yet you really should!! (Just as soon as you're done reading this! =) ) 


Raspberry Cream Pie

This pie comes together in a snap, is a little heavy but not excessively sweet. Its cool, its smooth, its the perfect dish for spring and summer. And the raspberries at just the perfect pinch of intensity that makes this dessert stand out.


*if you don't like raspberries, you could certainly trade out different fruit combinations ...Blueberry yogurt and blueberries or try a graham cracker crust with strawberries and strawberry yogurt. Have fun with the fruits that are in season! 


Ingredients:


25 Oreo cookies
4 tablespoons of butter, melted.
2 containers of Original Yoplait Yogurt (Red Raspberry)
1 cup heavy whipping cream
1 heaping cup of fresh raspberries
3 tablespoons of sugar
1 box vanilla Jell-o pudding

Step 1.
Preheat the oven to 350. Pour the raspberries in to a small dish and mash them up a little with a fork, leaving a few chunks for texture. Sprinkle the sugar over them, mix in and set them aside .

Step 2.
Toss your Oreos in a food process or blend there aren't any large chunks of cookie left. (if you don't have a food processor, a ziplock baggy and a wooden rolling pin will work just fine, and probably help you relieve some stress!)

Step 3. 
Mix the Oreos and the melted butter together in a bowl until well coated and crumbly.

Step 4. 
Pour and press the cookie mixture in to a 9 in pie dish, pressing the crust about halfway up the sides.

Step 5.
Bake for about 5 minutes so the crust is set and won't fall apart! Set aside to cool.

Step 6.
In a large bowl or stand mixer, mix together yogurt and vanilla pudding mix (just the mix, we're not actually making the pudding) until its well combined, low speed for about a minute. Make sure you scrap the sides a few times to get all the clumps of pudding mix out.

Step 7.
Slowly pour in the heavy cream. When combined crank it up to med-high and whip for about 2 minutes, or until the mixture is thick and fluffy.

Step 8.
Gently fold in those raspberries that have been sitting there taunting you, until well integrated. Does it look beautiful?

Step 9.
Pour the raspberry cream mixture into your prepared Oreo crust, smooth out and put in the freezer for 2 hours. (After about 30 minutes you could cover the top of the pie with tin foil.)

Let the pie rest on the counter at room temperature for about 15 minutes before you try to cut into it. Longer, if you leave it in the freezer, say, overnight. You can serve as is, and your guests will keep coming back for seconds and thirds, or serve with a dollop of whip cream and totally blow them away.

Or keep it all for yourself. That's what I am going to do with the next one! ;) 

Happy Spring! 

Tuesday, April 19, 2011

Best breaded pork chops I've ever had...

are definitely the Ultracrunchy Baked Pork Chops from Cooks Illustrated. Oh.my.Goodness! DH took one bite and said "oh!" so loudly it scared me.. my heart skipped a beat thinking that this new recipe was a failure. But that exclamation was quickly followed by "these are unbelievable!" And then I heaved a sigh of relief.

These are not the breaded 'chops I grew up with. No, sir... not a box of Shake 'n Bake in sight. I, personally, have never been a fan of breaded 'chops because the Shake n'Bake I grew up with was terrible... it was mushy, it didn't have any flavor.. it just grossed me out. (I apologize to any of you whom are devout Shake n'Bakers. I mean no offense!) So for the last 10 years of cooking on my own I have avoided them like the plague. But DH picked this recipe out as part of our weekly meal plan. I am so glad he did! This is another absolutely fabulous recipe from Cooks Illustrated. It came to me in one of my free mini-booklets (which means I can't link you the original). If you haven't checked these people at America's Test Kitchen out yet, you really should. I can't sing enough praises the dishes I've made from them!

This recipe has a few key ingredients that make it better than any other breaded food recipe I've seen. One is the  inclusion of a flavor (in this case spicy mustard) in the egg wash. Why this subtle step hasn't been included in other recipes before is beyond me. The second, and probably the most substantial, ingredient is FRESHLY made bread crumbs. You spice 'em up. You toast 'em. You make 'em delicious. I am a 100% complete convert to the freshly made bread crumbs. I'll never go back to store bought again for anything!

So go on, make these tonight for dinner -- and be prepared to be blown away.

Then be prepared for your family to ask for these again and again. =)

Ultracrunchy Baked Pork Chops


For once, I made this recipe completely as it is written in the book -- there is not a thing I could think of to add to enhance this dish. Its simply delicious! 

Ingredients


4 boneless center-cut pork chops, 6 to 8 ounces each, 3/4 to 1 inch thick,
4 slices hearty white sandwich bread, torn into 1-inch pieces
1 small shallot, minced
3 medium garlic cloves, minced or pressed through garlic press
2 tablespoons vegetable oil
2 tablespoons grated Parmesan cheese
1/2 teaspoon minced fresh thyme leaves
2 tablespoons minced fresh parsley leaves
1/4 cup plus 6 tablespoons unbleached all-purpose flour
3 large egg whites
3 tablespoons Dijon mustard
Salt and pepper
Step 1.
If you are using "enhanced pork" skip this step (your meat has already been brined .. kinda.) Dissolve 1/4 cup salt in 4 cups of water and soak the 'chops for 30 minutes. 

Step 2. 
Preheat the oven to 350. Take the 'chops out of the brine, rinse under cold water and let them rest on a paper towel to dry a little. 

Step 3. 
Take your torn up pieces of bread and toss them in a food processor -- about 8 pulses. (we want coarsely chopped, not a fine powder).

Step 4.
Pour your bread crumbs onto a rimmed baking sheet and toss with the garlic, salt and pepper, olive oil and shallots. Bake until dry and golden, turning every 5 minutes. (total cook time about 15 minutes)

Step 5. 
Let the bread crumbs cool to room temperature. Mix in parmesan, thyme and parsley. 

Step 6. 
Dig out 3 rimmed dishes (I used pie dishes). Pour 1/4 cup flour in the first one. Mix the egg whites, the 6 tablespoons of flour and spicy mustard together in the second, mix until thoroughly combined. . Fill the third with the breadcrumbs. 

Step 7. 
Turn up the oven to 475. Take a oven-safe cooling rack, spray it with cooking spray and fit it inside a cookie sheet. (This keeps the 'chops elevated, so they cook evenly all the way around for a whole chop batter that is super crisp and delicious!).

Step 8. 
Coat the 'chop in the flour, using thongs or your hands, then in the egg wash, then into the bread crumbs. Cover completely and press the bread crumbs in slightly to ensure a good stick and an even coating. Repeat for all 'chops! Place on prepared cookie sheet.


Step 9.
Bake for about 25 minutes (or until 150 degrees inside with an instant read thermometer.) Let them rest for 5 minutes. Then dig in! 


I served my 'chops with some roasted asparagus.  -- Super easy! 

Roasted Asparagus

Asparagus is a simple hearty side that is fun, tasty and good for you! I only use sea salt in my kitchen, just a sprinkle really brings out the flavor! 

Ingredients

Olive Oil
Coarse ground salt
Coarse ground pepper
1 bundle of asparagus, bottoms snapped.

Step 1. 
Wash and snap off the bottoms of your asparagus spears. They will snap off themselves, with little effort at about the bottom quarter. This part of the veggie is tough, so most people break it off.

Step 2. 
Drizzle some olive oil in a rimmed cookie sheet, and roll the asparagus around to coat. 

Step 3.
Sprinkle some coarse ground salt and pepper (fresh pepper if you have it and Kosher salt would work too)

Step 4.
Bake at about 475 for 10-15 minutes, or until the desired tenderness is reached. 

mmmmmMMmmmMmmmm! This meal is definitely on my to-do-again list!  I hope you give your breaded pork chops a revival -- I know you will be so glad you did! ;)